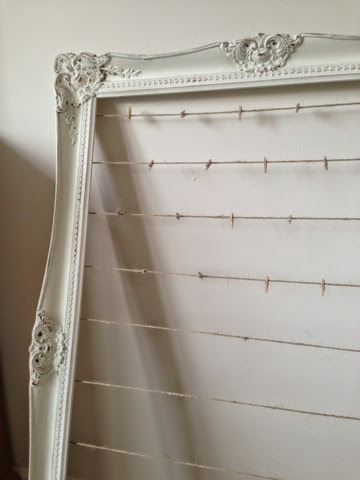
The second make was not quite as successful as the first :-s
I saw this picture on pinterest and tried to recreate it with an old picture frame that I had lying around.
 |
| Painted frame |
I started off by painting the frame in two coats of Old white Annie Sloan Chalk Paint. This is after painting. I forgot to take a before picture but it was once gold. I then sanded down the nobbly bits to highlight the detail. Once cleaned and dusted, I waxed the frame.
 |
| Stapling the string |
I then got some garden twine and stapled this in rows along the back of the frame.
 |
| Mini pegs |
and then I attached the mini pegs at about a 10cm distance along the twine.
It’s rather large! It looks a bit silly on my tiny desk. Eventually I will get Nick to hang it on the wall and hopefully then it won’t look so odd.
 |
| Notice board on the desk |
(function(i,s,o,g,r,a,m){i[‘GoogleAnalyticsObject’]=r;i[r]=i[r]||function(){
(i[r].q=i[r].q||[]).push(arguments)},i[r].l=1*new Date();a=s.createElement(o),
m=s.getElementsByTagName(o)[0];a.async=1;a.src=g;m.parentNode.insertBefore(a,m)
})(window,document,’script’,’//www.google-analytics.com/analytics.js’,’ga’);
ga(‘create’, ‘UA-52152461-1’, ‘roseyhome.blogspot.co.uk’);
ga(‘send’, ‘pageview’);


No Comments